Setup guide
Install Payload in the agent you already use.
Choose your app and follow the real connection flow. You can read the guide without an account; your agent asks you to sign in securely when it connects.
Choose your app
Set up Payload where you actually use it.
Each app connects differently. Pick yours, follow the pictures, and stop when you see Payload connected.
Command + /mcp
 Claude Code setup
- 1
Add Payload in Terminal
Copy this command and paste it into Terminal. It adds Payload for your user account, so it works in every project.
claude mcp add --transport http --scope user payload https://getpayload.ai/mcp - 2
Open Claude Code and run /mcp
Start Claude Code, type /mcp, then select Manage MCP servers. This is where you can see whether Payload still needs sign-in.
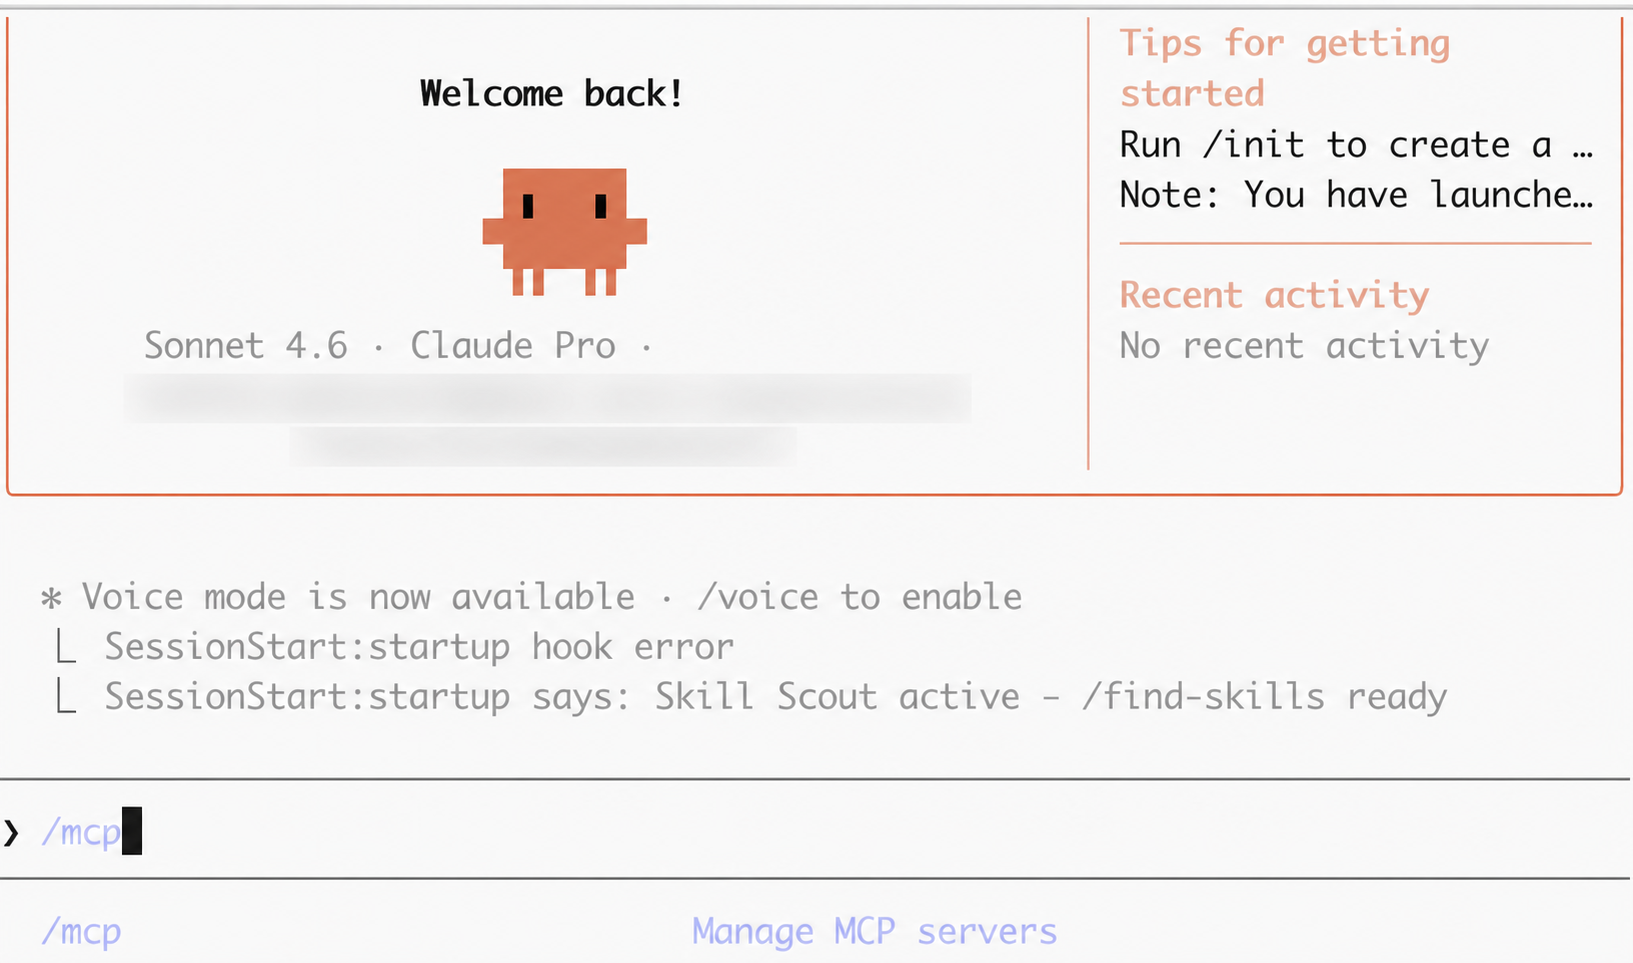
Type /mcp in Claude Code to open the MCP server list. - 3
If Payload says failed, connect it
A failed status simply means the server needs browser authorization. Select payload from the MCP list to start the sign-in.
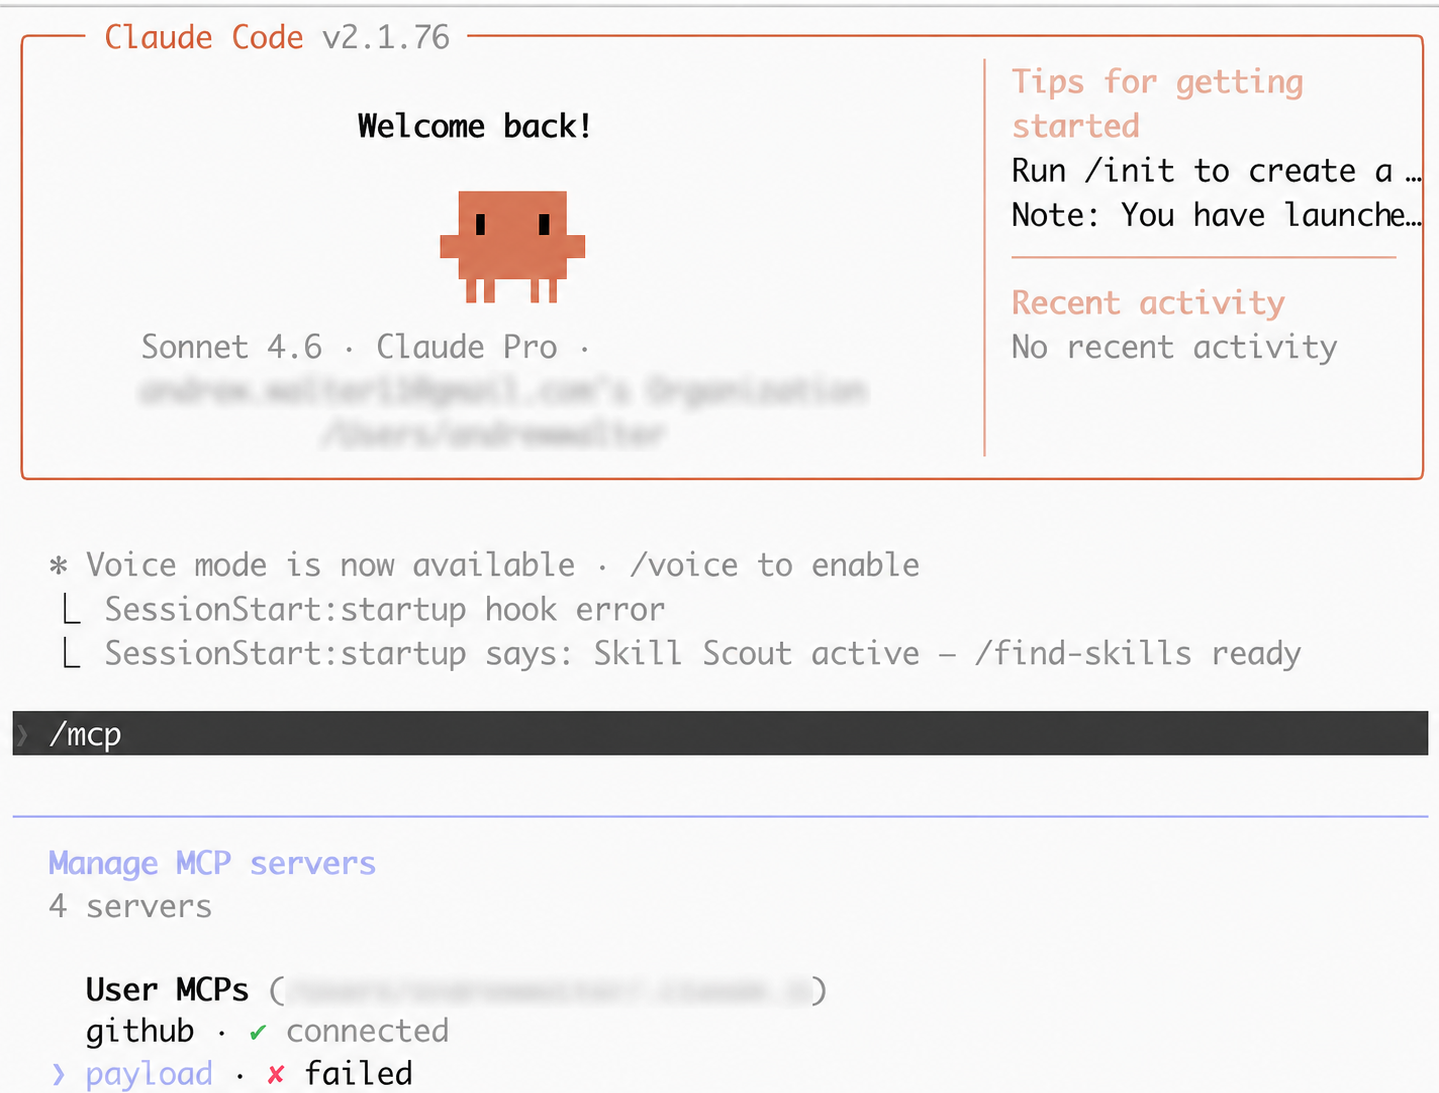
Payload needs its one-time browser sign-in when it shows failed. - 4
Allow Payload in your browser
Claude opens the secure Clerk permissions page. Select Allow, then return to Claude Code.
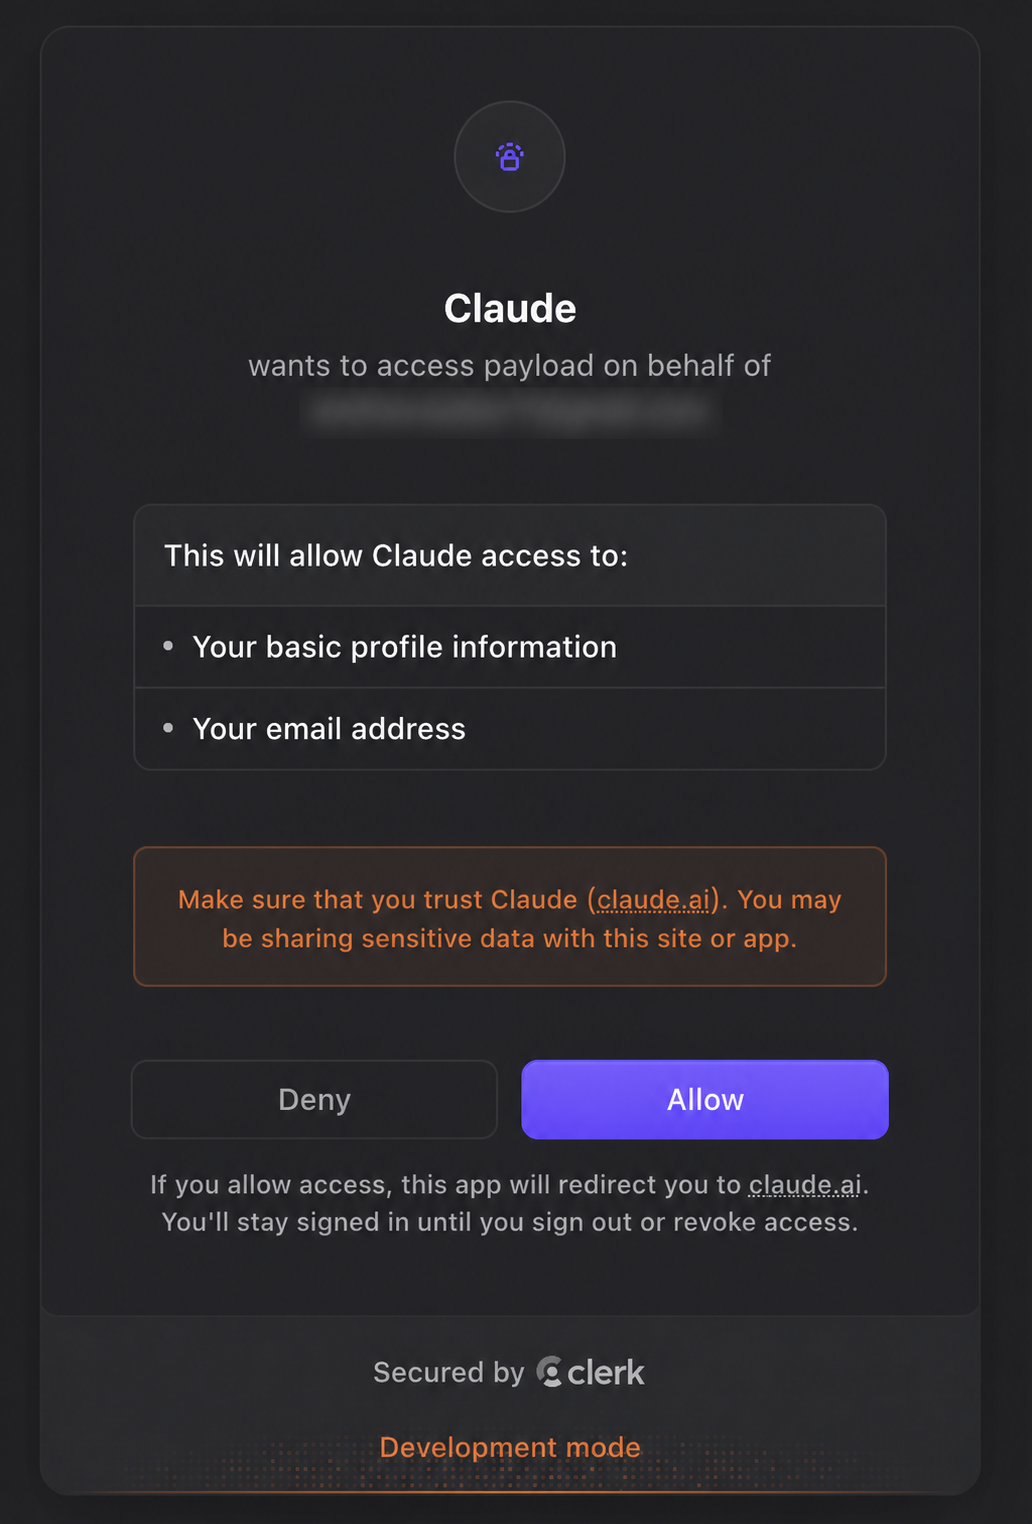
Select Allow to authorize Payload. The account email is redacted here. - 5
Confirm Payload is connected
Open /mcp again. A green connected status beside payload means everything is ready.
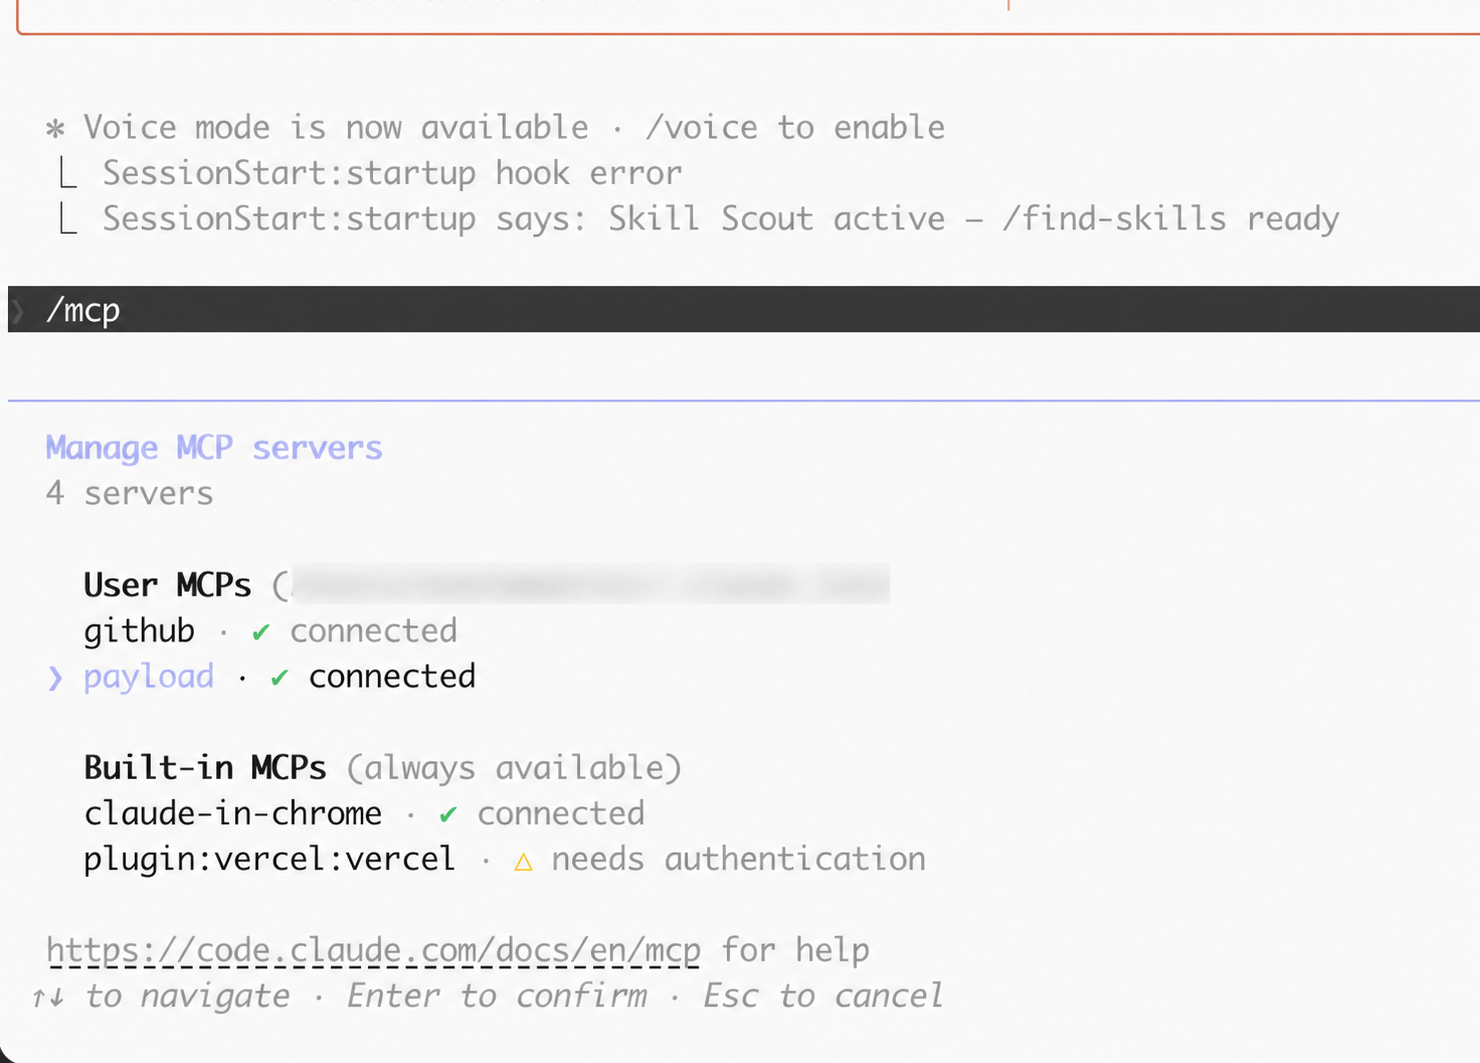
Payload shown as connected in Claude Code. Your local file path is redacted.
Already installed?
Open your dashboard to confirm Payload is connected and ready to attribute earnings to your account.